
Introduction
The more services we deploy on AWS, the easier it is to get lost. At first, we know all the services we use by heart, the number of Lambdas or EC2 instances running. But little by little, it’s easy to feel overwhelmed, especially when different projects pile up. Quickly finding which resources belong to which project, or identifying those that weren’t properly cleaned up after a PoC, can quickly become a headache. And that’s without even mentioning cost visibility! Fortunately, there’s a simple yet incredibly powerful practice: tagging.
In this article, I want to show you that a good tagging strategy is crucial for your organization, the way you handle cost, and to secure your AWS account.
Ready? Tag along with me!
Why are tags useful?
Imagine labels on moving boxes. Without them, it’s impossible to know what’s inside or which room they belong to. Tags on AWS are the same! A tag is a piece of information (in key-value format) that you assign to your resources (EC2 instances, S3 buckets, RDS databases, etc.). A good tagging strategy allows you to, among other things:
- Identify orphan resources: This is the classic scenario. A resource without a
ProjectorOwnertag? There’s a good chance it has been forgotten and is consuming resources (and therefore money) for nothing. Listing untagged (or poorly tagged) resources is an essential first step in cleaning up. - Allocate costs: By tagging your resources with a project identifier, cost center, or team, you can then use AWS Cost Explorer to filter your expenses and understand precisely which projects consume the most. This is essential for internal chargebacks or simply for optimizing your budget.
- Automate actions: Tags can serve as triggers for automation scripts (for example, backing up all EC2 instances with the tag
Backup=Daily). - Manage access and security: The AWS IAM service can use tags to grant granular permissions.
In short, tagging is the foundation of good Cloud governance. For more details, I invite you to consult the tagging guide proposed by AWS.
Fortunately, we can associate multiple tags with the same resource. But this raises the question: how many tags are necessary?
This will depend on your company and each project, but overall, there are some tags that won’t hurt, no matter your situation:
- Project: The name of the project linked to the resource. Usually, the GitHub repository name works well.
- Environment: The desired environment (dev, uat, prod, …). Even if you have separate AWS accounts, this will help you identify if a resource got lost during deployment.
- Owner: The owner of the resource. This could be a person, but more ideally a team (frontend, backend, security, …).
Depending on your use case, you’ll surely have other ideas for tags, but with the ones above, you’ll already have a good start! And in case of doubt, feel free to read the tagging best practices from AWS.
Let’s now look at some concrete examples of using tags in AWS.
AWS Cost Explorer: Tracking costs thanks to tags
One of the most concrete benefits of tagging is the visibility it provides over your expenses. AWS Cost Explorer is the tool of choice for this.
Once your resources are correctly tagged (for example, with the Project tag), you need to activate these tags for cost allocation in the AWS Billing and Cost Management console (Billing and Cost Management -> Cost Organization -> Cost Allocation Tags). Be aware that there might be a delay before the activated tags appear in Cost Explorer.
Once activated, you can:
- Filter by tag: In Cost Explorer, you can filter your costs by the value of a specific tag.
- Group by tag: You can also choose to group your expenses by tag. This will give you an overview of the cost distribution across different projects, environments, etc.
- Create budgets based on tags: With AWS Budgets, you can set alert thresholds for costs associated with specific tags, helping you avoid nasty surprises.
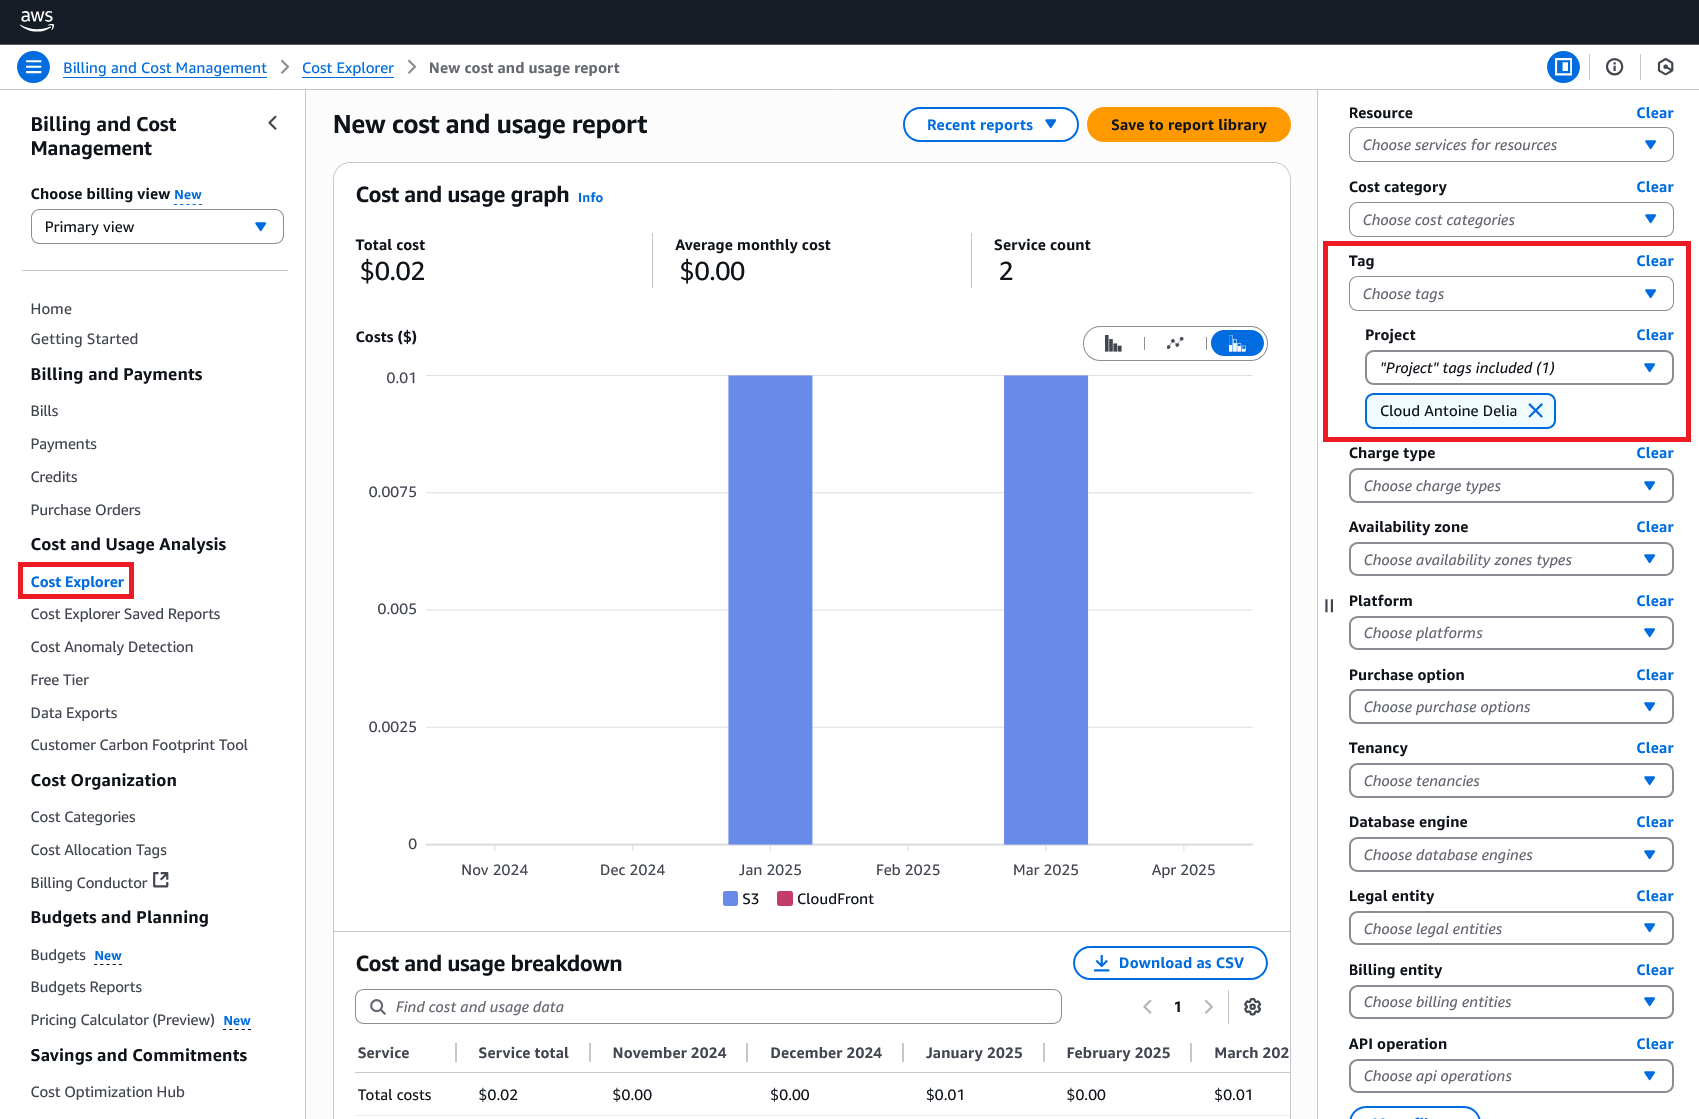
Example of filtering by tag for my blog: the costs are minimal, am I a FinOps expert?
This ability to dissect your AWS bill by tags transforms cost management from an obscure chore into a transparent and controllable exercise. It’s a must for any organization concerned about its Cloud budget. You can now add FinOps to your LinkedIn bio!
AWS Resource Explorer: Keeping an eye on deployed resources
Now that we are convinced of the usefulness of tags, how do we list all the resources that use a specific tag? We will see this together, with one part in the AWS console, and another part in the terminal (for all the geeks reading this article!).
Visual exploration in the AWS console
If you are not yet familiar with AWS Resource Explorer, now is the time to discover it! This relatively recent service allows you to search and discover your AWS resources across all regions of your account, using a simple interface, much like a search engine.
The main advantage of Resource Explorer is its ability to give you a unified view. No more jumping from region to region. You activate indexing, and then you can search for your resources by name, ID, and of course… by tag!
It’s an excellent tool for:
- Getting a quick overview.
- Visually exploring resources associated with a specific tag.
- Quickly identifying resources without having to code anything.
To use it, activate it in the desired regions (or all of them), let it index your resources, and then use the search bar with a syntax like tag.key:Project tag.value:Cloud*.

Example of a tag search for my blog: only three resources manage this blog!
A more technical approach with AWS CLI
For those who, like me, like to have control via the command line, or who need to automate these searches, the AWS CLI remains a key ally. More specifically, it’s the resourcegroupstaggingapi service that will interest us.
The key command is get-resources. Here is a typical example to list the ARNs of all resources having the tag Project with the value “Cloud Antoine Delia”:
|
|
Which gives us:
|
|
Let’s break it down a bit:
aws resourcegroupstaggingapi get-resources: This is the API call; so far, so good.--tag-filters "Key=Project,Values=Cloud Antoine Delia": This is where we specify our filter. We are looking for the tag Project with the value “Cloud Antoine Delia”. You can add multiple filters.| jq "[.ResourceTagMappingList[].ResourceARN]": jq is a wonderful tool for manipulating JSON on the command line. Here, we use it to cleanly extract the list of ARNs of the found resources (you can do without it, but why make life difficult?).
Hey, wait a minute! In the console, you show us three resources, and now there’s only one! Where’s the catch?
Well spotted! You should know that when you make your API call, you are using a default region. However, if you have resources in various regions, you will need to specify it. Thus, if we add --region us-east-1 just before the jq pipe, we indeed get our two missing resources.
|
|
Besides this detail that you must not forget, this command is extremely powerful because you can integrate it into scripts to:
- Generate regular reports on resources by project.
- Automatically detect resources that do not comply with your tagging policy.
- Combine with other AWS CLI commands to perform actions on the listed resources.
For example, you could list all your resources of a certain type (e.g., all your EC2 instances) and check which ones are missing essential tags.
And if you’re wondering if AWS doesn’t already offer a service for this… It does! But we will talk about that in a future article (for the curious, I’m talking about AWS Config).
AWS IAM: Securing the use of your resources
Your resources are deployed in AWS, and now you want to give a team permission to manage all of that. But here’s the thing, in your AWS account, you also have critical resources that must absolutely not be compromised.
AWS IAM is here for you! Using a simple policy, you can specify that only resources with a certain tag can be modified by a user or group.
Let’s take the following example: you would like to allow a team to start or stop certain EC2 instances, but prevent them from accidentally stopping a critical EC2 instance! You just need to add the following policy to your users:
|
|
Thus, your users will be autonomous in using their resources, without having the possibility to impact other resources.
Conclusion
You’ve understood it: a rigorous tagging strategy isn’t an option; it’s a necessity for operating serenely on AWS. Whether on the organizational, financial, or security management level, AWS gives you the means to take full advantage of your tags.
So, a little piece of advice: if you haven’t already, define a clear tagging policy in your organization, apply it, and use these tools to regularly check that everything is in order. You’ll thank me later!